Homesteading: DIY composter
By Isabelle Legault and Ryan Spence
On the farm we need a good source of nutrients each year to feed our vegetables. Stores offer a multitude of different fertilizers that will “miraculously” give us the “best” results. However, being the eco and health-conscious business owners that we are, there are a number of questions we ask ourselves before buying anything: what are these products made from? Where are they made? How are they made? Would they create adverse health effects if used to grow food? Asking all of these questions would take a lot of time with no guarantee of finding answers. So, what to do? Make your own nutrient-rich fertilizer by composting at home!
What is compost? Simply put it is a mixture of organic residues. The act of composting is to enable the decomposition of organic matters so that they break down into a substance that can then be used by your plants in the garden. Compost has all kinds of benefits both in the garden and out of the garden. One of the principle benefits is the resulting fertilizer for your garden. Compost adds essential nutrients, as well as organic matter to your soil. This will feed your plants as well as the microorganisms in the soil that help your plants to grow. Another benefit is that a big part of household waste no longer has to be transported to the dump. Composting would reduce greenhouse gas emissions created during transportation, while providing you with free plant food for your own home garden!
On the farm we take composting very seriously for two main reasons. Firstly, we need the nutrients for our gardens and, secondly, because there is a bit of science to a proper compost. Here are the steps that we take in order to produce high quality compost:
- Alternate each layer of your pile with brown matter and green matter. Green matter is fresh material from the kitchen or plants that have been recently pulled out of the garden. Brown matter comes in the form of straw, dried grass clippings, dried leaves, cardboard and the like. Ideally you start your compost with a layer of brown matter and then add a layer of green material. You repeat this cycle over and over. The ratio should be 60 per cent brown matter to 40 cent green matter. What this does, essentially, is it keeps the nitrogen to carbon ratio in check. The carbon-based element (or brown matter) absorbs the nitrogen released by the decomposition of the green matter. This way you keep the nutrients within your compost instead of losing them to their gaseous states. How to you make sure that you are keeping this ratio in check? Simple! A good balance of brown and green matter makes practically odorless compost.
- Watering. It is important to keep an adequate level of moisture in your compost. You don’t want it too wet or too dry. During the heat of the summer, you should water your compost about once or twice per week, depending on your composting bin. We find that we have to water more often with our wooden composter compared to how often we used to water our black plastic composter. In the spring and fall you’ll have to water less often. Moisture is key, as it will continue the decomposition of the organic matter. The easiest way to tell if your compost has the proper moisture content is by squeezing it with your hand. Well-watered compost should have the moisture level of a wrought-out sponge.
- Mixing. Mixing your compost helps to aerate it and incorporate the brown and green matter together. It also keeps the moisture level consistent. You want to start mixing your compost once your composter is about half-full. From that point on, you will want to mix the compost every two weeks or so.
- The Do-Not’s! Generally speaking, you do not want to mix in refuse from weeds that have gone to seed. The decomposition process doesn’t necessarily kill the weed seeds, which means that once you spread that compost out you are potentially planting a whole bunch of weeds. Also, do not put refuse from diseased plants into the compost. In theory the temperatures reach by proper decomposition could kill these diseases, but it isn’t worth the risk.
By doing these four steps on a regular basis you will allow your compost to decompose properly. This decomposition process will produce enough heat to kill off pathogens, which also makes the compost safe to use with food products. Ideally, your compost should reach temperatures of 55 to 70 degrees Celsius for a period of three to four days to kill the bad pathogens, if any. At the farm we use a 20″ thermometer in order to accurately measure the temperatures. However, when composting at home, you can just follow the above steps and wait three to four days before adding more material, watering and mixing. In the end the result will be a rich, dark, nutrient-packed plant food ready for your garden. If you stay on top of this process your compost can be ready within one year after the decomposition starts, but ideally you should wait two to three years before incorporating your compost into your garden. This brings up another problem: where does new refuse go when prior materials are in the decomposition cycle?
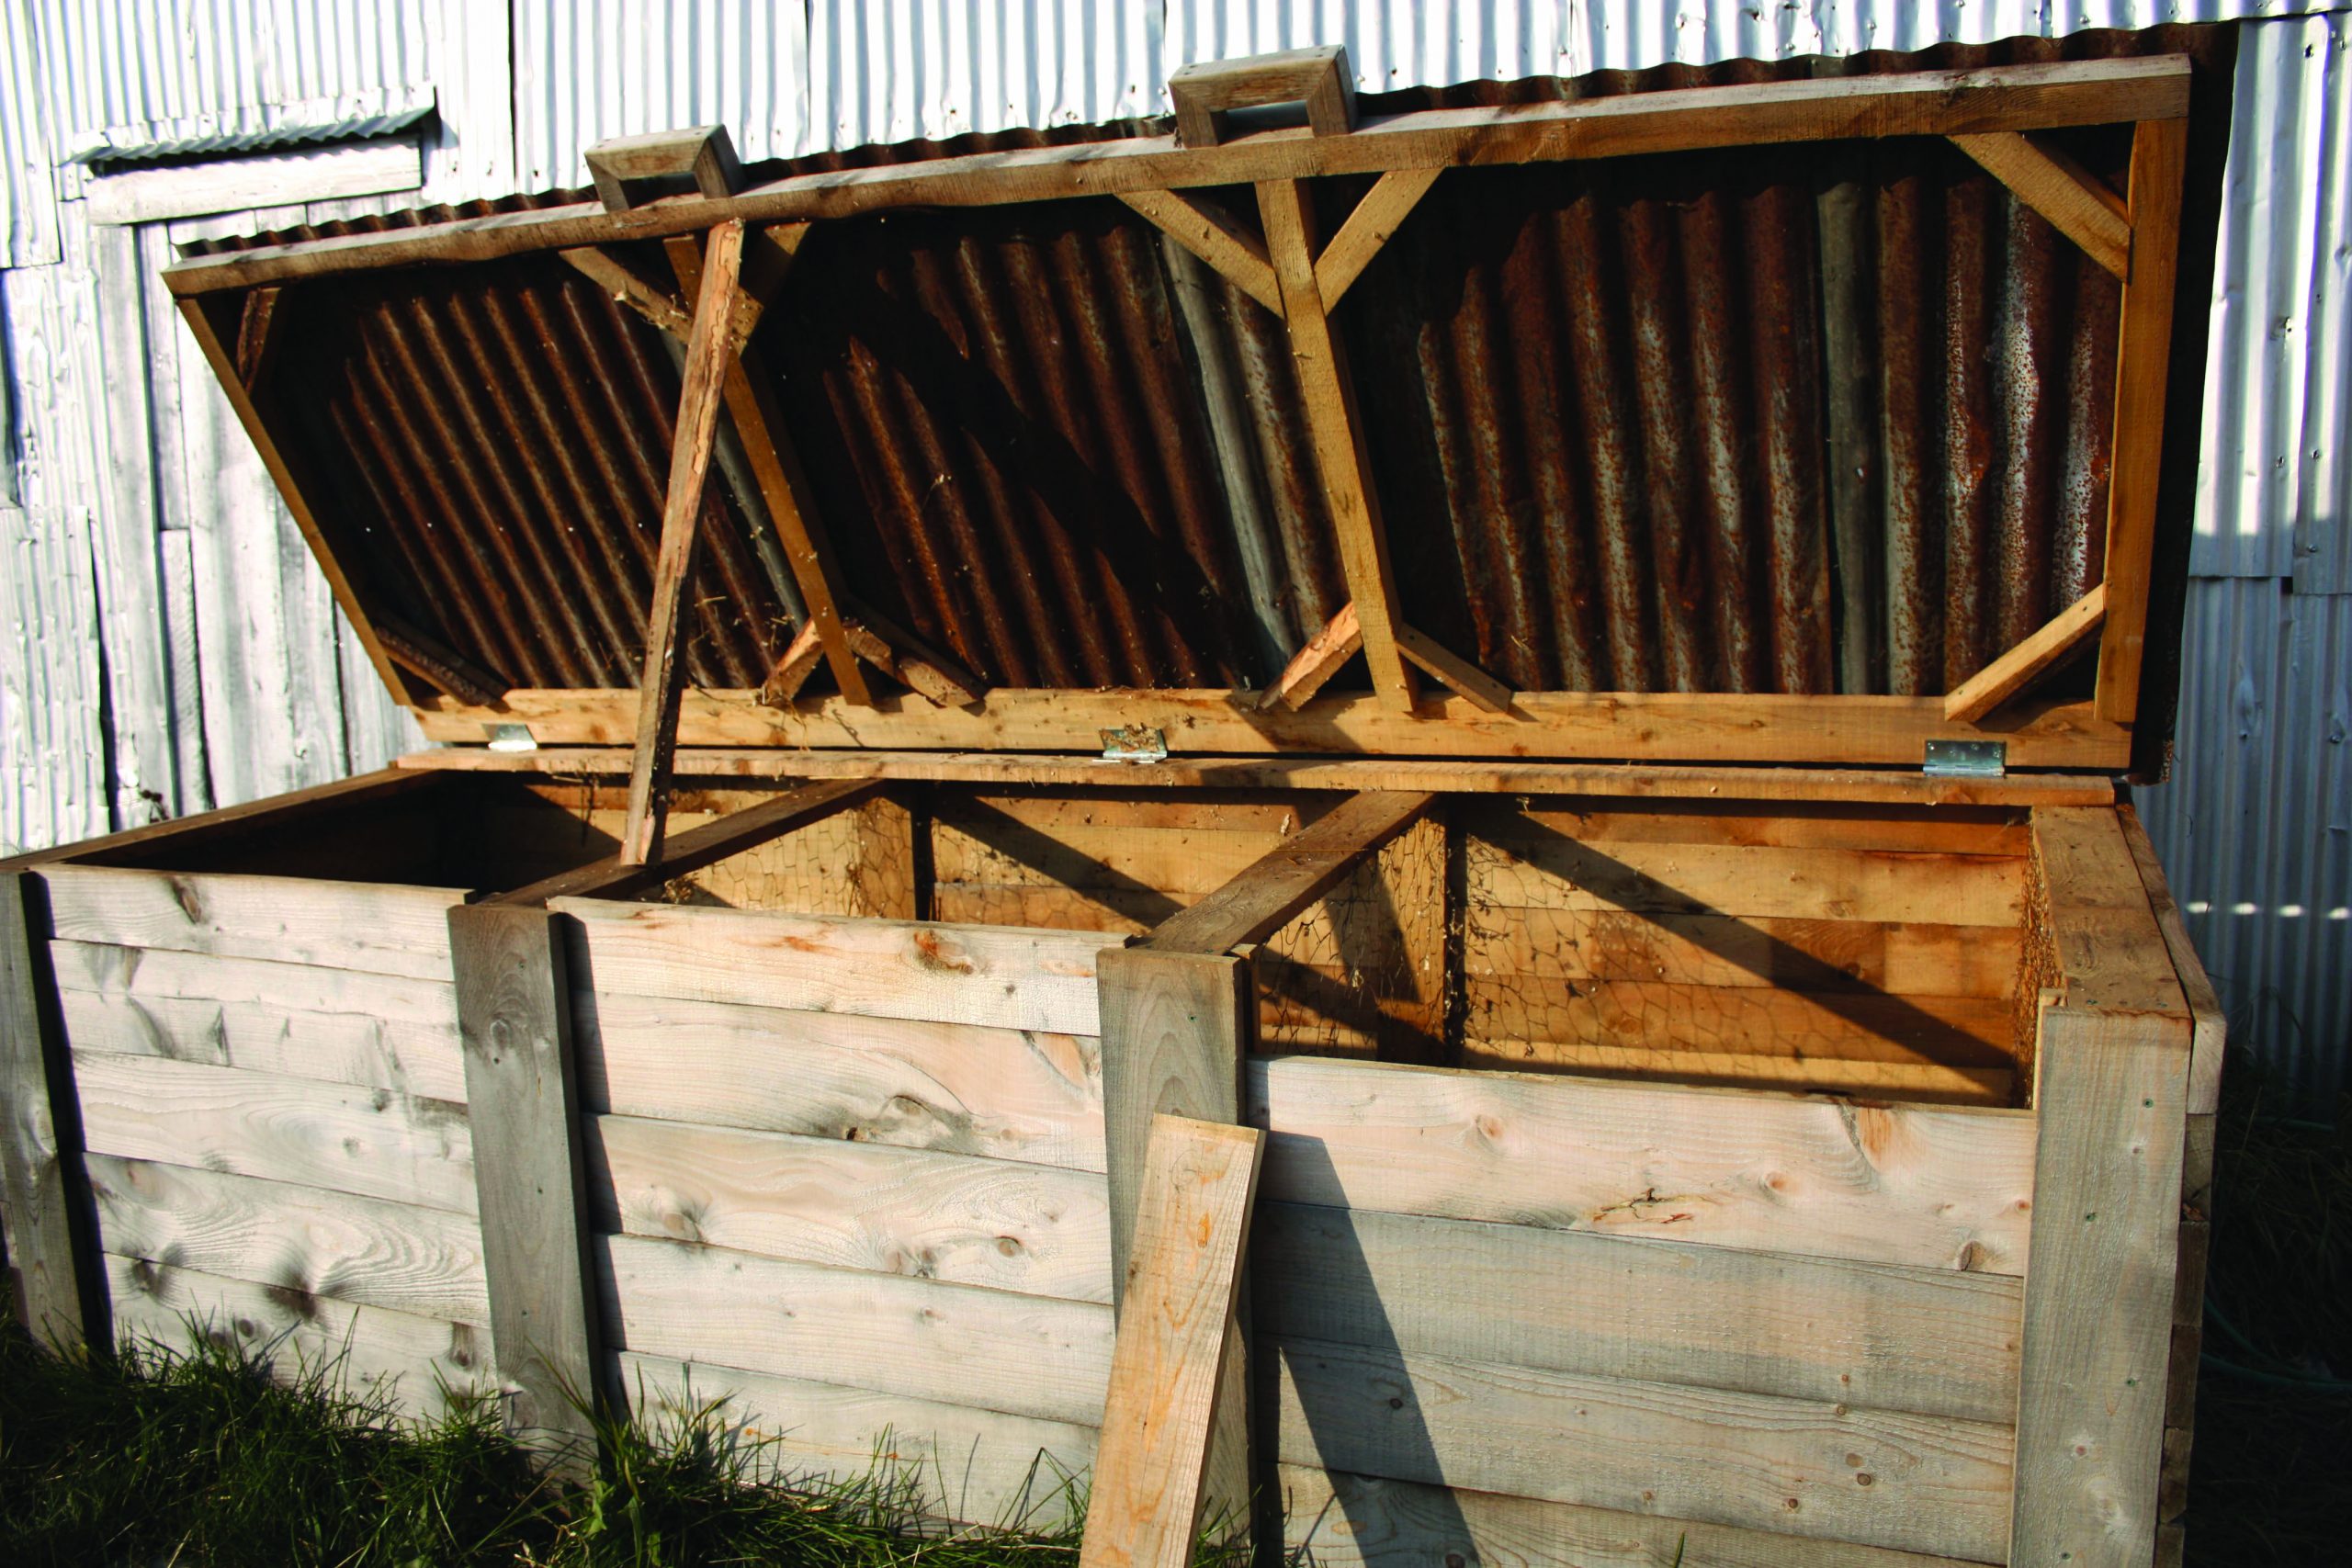
On the farm we have two types of compost: manure and vegetable refuse. Manure is dealt with using a more elaborate system, which we will not go into detail about. For the vegetables we use what is called a three-year composter. It comprises three separate compartments covered by one sturdy lid. In year one we use the first compartment for our vegetable refuse and brown matter. Then, in year two, compartment one is watered and mixed and the new green and brown material goes into compartment two, which is also watered and mixed. Then, in year three, compartments one and two are only watered and mixed and the refuse is put into compartment three, which is also watered and mixed. Finally, in year four the compost from compartment one is now well composted and ready for the garden so it can be taken out and start accepting new compost once again. This is the ideal situation to create good compost. There are many other kinds of composters out there but most of them won’t allow for the three-year cycle. This doesn’t mean that they aren’t worthwhile; it just means that you have to be very diligent in terms of watering and mixing to make sure that decomposition happens as quickly as possible.
Our composter took about 2 days to build and all that we needed to build it were a few basic tools, wood boards, old tin roofing, and chicken wire.
Regardless of the composter you choose to build the important thing is to follow the four principles so as to get a good final product: layer, water, mix’er, and stay away from the do-nots. Like many things in life, the effort is well worth the reward!
Isabelle Legault and Ryan Spence are the owners of Field Good Farms, just west of Cache Bay, ON. www.fieldgoodfarms.ca